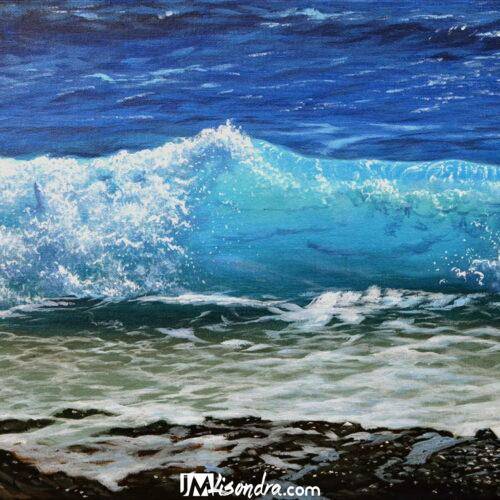
The Ultimate Guide to Painting Beaches and Crashing Waves

Welcome to our comprehensive collection of painting tutorials that will help you master the art of capturing the beauty of beaches and crashing waves. Whether you are a beginner or an advanced artist, these step-by-step exercises will provide you with the skills and techniques needed to create stunning coastal landscapes. So grab your brushes and let's dive in!

Why Paint Beaches and Crashing Waves?

Beaches and crashing waves are a popular subject for artists due to their dynamic nature and the sense of tranquility they evoke. Capturing the movement of waves and the play of light on the water can be both challenging and rewarding. By practicing these exercises, you will not only improve your painting skills but also learn to observe and appreciate the subtle nuances of coastal scenery.

Materials You Will Need

Before we begin, let's make sure you have all the necessary materials to complete these painting exercises:

MaterialsDescription
Canvas or any Painting SurfaceChoose a size that suits your preference. I mostly used 12x14 inches for my tutorials
Acrylic PaintsI used student grades like Sakura, Liquitex Basics and Pebeo Studio
Paint BrushesMy brushes are assorted.
PaletteFor mixing and blending of colors
PaletteThis is optional for textures
WaterI just use water for cleaning and even mixing to paints
EaselOptional, for comfortable painting
You can check full lists of materials here.

Painting Tutorial: Beach and Crashing Waves

In this tutorial, we will start with a serene and calm beach scene. Follow these steps to create a peaceful coastal landscape:

  1. Prepare your canvas by applying a thin layer of gesso to prime the surface.
  2. Sketch the basic outline of the beach, including the shoreline and any prominent features such as rocks or cliffs.
  3. Begin by painting the sky using light blue and white tones. Gradually add more depth and variation to create a realistic sky.
  4. Mix different shades of blue, green, and white to create the colors of the water. Apply the paint with broad strokes to capture the movement of the waves.
  5. Add details to the beach, such as sand, seashells, or beach grass. Use a combination of warm colors to create depth and texture.
  6. Enhance the overall composition by adding any additional elements, such as a distant sailboat or birds in the sky.
  7. Allow the painting to dry completely before making any final adjustments or adding highlights.
  8. Step back and admire your calm beach scene!

You can watch the full lessons below for your practice. Enjoy!

Fisherman on red boat
Sunset beach with sailboat and crashing waves
Rocky Beach and Crashing Waves
Rocky beach and crashing waves 2

You can also check more lessons here on my website.

Additional Tips and Techniques

Here are some additional tips and techniques to help you improve your beach and crashing waves paintings:

  • Study reference photos or visit the beach in person to observe the colors, shapes, and textures of waves and coastal landscapes.
  • Experiment with different brushstrokes and techniques to create movement and texture in your paintings.
  • Use a limited color palette to create harmony and unity in your artwork.
  • Play with light and shadow to add depth and dimension to your beach scenes.
  • Practice painting water reflections to capture the shimmering effect of sunlight on the waves.

For more advanced techniques and inspiration, you can explore more free lessons on my youtube channel ART OF JOHN MAGNE LISONDRA, and don't forget to SUBSCRIBE!

Conclusion

By following these painting exercises and incorporating the tips and techniques mentioned, you will be well on your way to mastering the art of painting beaches and crashing waves. Remember, practice is key, so don't be afraid to experiment and make mistakes. With each stroke of your brush, you will gain confidence and improve your skills. So go ahead, unleash your creativity, and let the beauty of coastal landscapes inspire your artwork!

Waterfalls, with their cascading power and serene beauty, have captivated artists for centuries. Capturing their essence on canvas, however, can seem daunting. But fear not, aspiring landscape painters! This comprehensive guide will equip you with the skills and techniques to master waterfall painting in acrylics, transforming your blank canvas into a breathtaking masterpiece.

Before We Begin:

  • Gather your supplies: You'll need acrylic paints in various blues, whites, greens, browns, and yellows, along with brushes (flat, filbert, round), a palette knife, and a canvas primed for acrylics. You can check all the materials in this link.
  • Tutorial Videos: You can check the step by step tutorials below.
  • Practice patience: Mastering any art form takes time and dedication. Embrace the learning process and enjoy the journey!

Step-by-Step:

1. Sketch the Landscape:

  • Lightly sketch the basic composition on your canvas, outlining the waterfall, rocks, and surrounding foliage. Use a pencil with minimal pressure to avoid smudging.

2. Establish the Background:

  • Begin with the sky, using washes of blue and white to create a soft gradient.
  • Blend in distant mountains or hills with muted greens and browns.

3. Paint the Rocks:

  • Use a variety of browns, grays, and ochres to create the rocky base of the waterfall.
  • Employ dry brushing techniques and textured strokes to add depth and realism.

4. Capture the Power of Water:

  • This is the showstopper! Start with the base of the waterfall, using bold blues and whites to depict the rushing water.
  • Layer different shades of blue to create depth and movement.
  • Use white for highlights and splashes, mimicking the frothy texture of falling water.
  • Experiment with various brushstrokes: long, thin strokes for cascading water, stippling for foam, and splatters for mist.

5. Bring the Landscape to Life:

  • Paint the surrounding foliage with various greens, adding texture with different brushstrokes and layering.
  • Include details like moss on rocks, wildflowers, and distant trees.

6. Enhance the Mood:

  • Adjust the values and colors to create the desired atmosphere.
  • For a dramatic scene, use darker blues and contrasting highlights.
  • For a serene ambiance, opt for lighter blues and softer shadows.

Pro Tips:

  • Work in thin layers: This allows for better blending and prevents muddy colors.
  • Don't be afraid to experiment: Let your creativity flow and try different techniques.
  • Pay attention to details: Small touches like mist, foam, and reflections can elevate your painting.
  • Step back frequently: Assess your work from a distance to ensure balanced composition and harmony.
  • Most importantly, have fun! Embrace the process and enjoy the satisfaction of creating your own waterfall masterpiece.

Tutorial Collections Below:

Waterfalls and Rushing River
House with waterfalls
How to paint rocky mountain and waterfalls in acrylics?
How to paint landscape with autumn birch tree with waterfalls?
Landscape painting tutorial on how to paint autumn waterfalls

With dedication and these helpful steps, you'll be well on your way to mastering the art of waterfall painting in acrylics. Remember, practice makes perfect, so grab your brushes, unleash your creativity, and let the beauty of cascading water flow onto your canvas!

Happy painting!

You can check my Youtube Channel for more FREE Lessons.

linkedin facebook pinterest youtube rss twitter instagram facebook-blank rss-blank linkedin-blank pinterest youtube twitter instagram