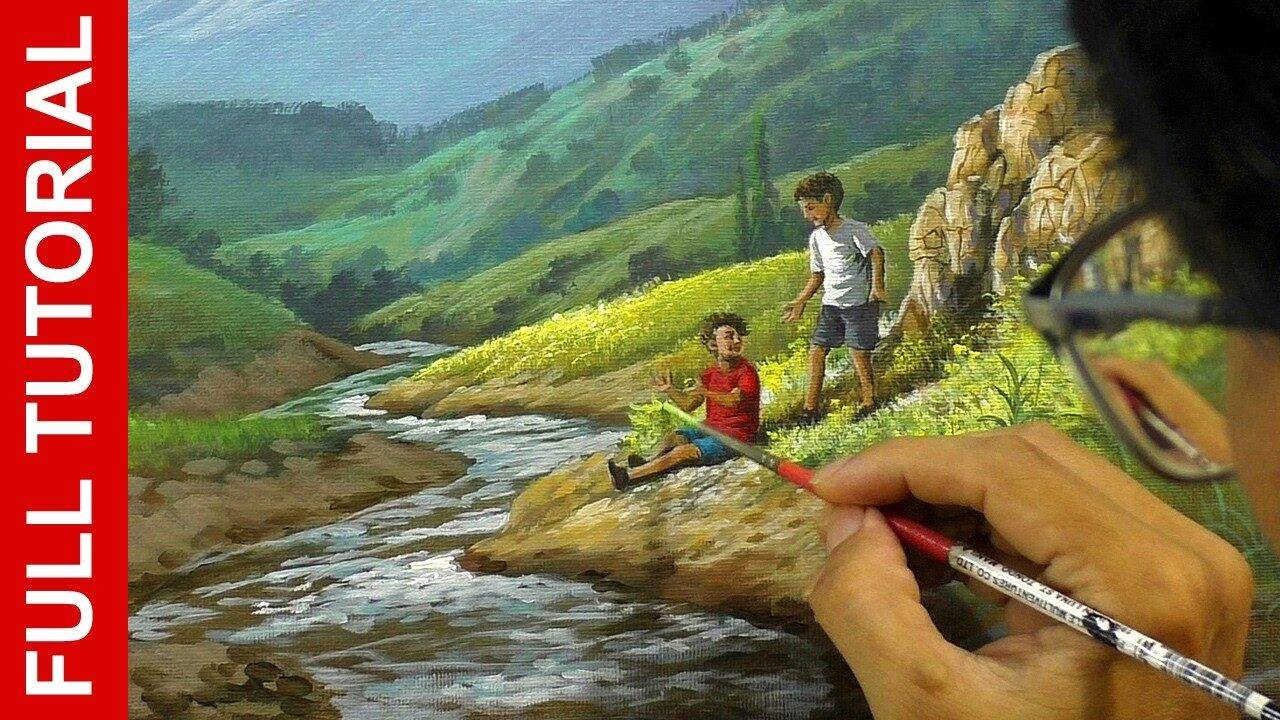
Children Beside the River Full Acrylic Painting Tutorial with Step-by-Step Instructions in 54 minutes
How to Paint Children Beside the River?
Are you ready?
Introduction
Welcome, aspiring artists! Today, we're embarking on a delightful journey to capture the innocent joy of "Children Beside the River" with acrylic paints. This comprehensive acrylic painting tutorial, designed to take approximately 54 minutes, will guide you through each brushstroke, from initial sketch to final touches. Acrylics are wonderfully versatile, quick-drying, and perfect for beginners and seasoned painters alike. So, gather your supplies, find a comfortable spot, and let's bring this charming scene to life!
Focus Keywords: Children Beside the River, acrylic painting tutorial, step by step instruction
Materials You'll Need:

Before we dive in, let's ensure you have everything ready:
- Canvas or Painting Surface: We recommend an 11x14 or 12x16 inch canvas, but any size you're comfortable with will work.
- Acrylic Paints:
- Titanium White
- Cadmium Yellow (or a similar warm yellow)
- Cadmium Red (or a similar warm red)
- Ultramarine Blue (or a similar primary blue)
- Burnt Umber (dark brown)
- Raw Sienna (earthy yellow-brown)
- Sap Green (or a similar vibrant green)
- Lamp Black (optional, for very dark accents)
- Brushes:
- Large flat brush (for washes and backgrounds)
- Medium round brush (for general painting and blending)
- Small round brush (for details and fine lines)
- Small flat or angular brush (for sharper edges)
- Palette: A plastic plate, a ceramic tile, or a dedicated paint palette.
- Water Containers: Two cups of water – one for rinsing dark colors, one for light.
- Paper Towels or Rags: For drying brushes and blotting excess paint.
- Pencil and Eraser: For your initial sketch.
- Easel (Optional): If you prefer to paint upright.
- Reference Image: While we'll guide you, having a mental image or even a simple photograph of children by a river can be helpful for inspiration.

Recommended art materials available in Amazon.
The Painting Process: Step-by-Step
Step 1: Sketching the Two Children beside the river (Approx. 8 minutes)
Our journey begins with the foundation of our painting: the sketch. A good sketch provides the roadmap for our colors and forms.
- Lightly Outline the Composition: Start by envisioning where your two children will be placed on the canvas. Will they be standing, sitting, or perhaps one of each? Consider the flow of the river and how they interact with their environment.
- Roughly Block Out Figures: Using your pencil, very lightly sketch two basic stick figures or simple shapes to represent the children. Focus on their general posture, head shape, and the direction they are facing. Don't worry about details yet; we're establishing proportions and placement. One child might be a bit taller, the other a bit smaller, creating a dynamic duo.
- Add Basic Clothing Shapes: Once you're happy with the figures' positions, add simple shapes for their clothing – a shirt, shorts, or a dress. Keep it loose and gestural.
- Indicate the Riverbank: Lightly sketch a line that suggests the edge of the riverbank where the children are positioned. This helps anchor them in the scene.
- Refine Key Features (Lightly): If you feel comfortable, you can add very faint indications of where their eyes, nose, and mouth will be, but remember, these are just guides. We'll add most of the facial details with paint later.
- Avoid Pressing Hard: Remember to keep your pencil lines light. Heavy graphite can sometimes mix with your paint and show through. You want just enough detail to guide you.
(Time Check: At this point, you should be around the 8-minute mark. Don't rush; a good sketch saves time later.)
Step 2: Painting the Darker Shades Using Dark Colors (Approx. 15 minutes)
Now that our sketch is complete, it's time to introduce color and establish the darker tones that will give our painting depth and form in children beside the river. Think about the areas where shadows would naturally fall.
- Prepare Your Dark Mixes: On your palette, mix a dark green for distant foliage (Sap Green + a touch of Ultramarine Blue and Burnt Umber), a dark brown for tree trunks and branches (Burnt Umber + a tiny bit of Black if desired), and a deep blue for the shadowed parts of the river (Ultramarine Blue + a hint of Burnt Umber).
- Block in Background Elements: Using your large flat brush, apply the dark green mix to the areas in the background that represent distant trees or bushes. Don't aim for precision; just get the general shapes and darkness down.
- Establish River Shadows: With your medium round brush, paint the darker areas of the river. Imagine where shadows would be cast from the children, trees, or the riverbank itself. This will create immediate depth.
- Shadows on Clothing: Look at your sketched children. Where would the folds in their clothes create shadows? Use a slightly watered-down mix of Burnt Umber or a darker version of their intended clothing color to block in these initial shadow areas on their shirts, shorts, or dresses.
- Initial Hair Color: If the children have dark hair, use a mix of Burnt Umber and a tiny bit of black to block in the general shape and darkest areas of their hair. If they have lighter hair, use a dark version of that lighter color (e.g., Raw Sienna + Burnt Umber).
- Darker Areas of the Ground/Riverbank: Use your dark brown or a mix of Burnt Umber and Sap Green to indicate shaded areas on the ground or riverbank directly beneath the children and other objects. This helps ground them in the scene.
(Time Check: You should now be around the 23-minute mark. Your painting should be starting to take on form and depth.)
Step 3: Painting the Skin Colors (Approx. 10 minutes)
This step requires a delicate touch as we build the warm, lively tones of the children's skin.
- Mix Your Base Skin Tone: This is where the magic happens! Start with a generous dollop of Titanium White. Add a tiny speck of Cadmium Yellow, then an even tinier speck of Cadmium Red. Mix thoroughly. You're aiming for a warm, peachy-beige. It's better to start lighter and add more color gradually. You might also add a hint of Raw Sienna for warmth.
- Apply Base Skin Tone: Using your small round brush, carefully apply this base skin tone to the exposed areas of the children's skin – faces, arms, and legs. Work slowly and observe your reference if you have one.
- Add Mid-Tones/Slightly Darker Areas: While the base skin tone is still wet (or after it's dried, then apply another thin layer), mix a slightly darker version of your skin tone by adding a bit more Raw Sienna or a tiny touch of Burnt Umber to your base mix. Apply this to areas that would be in slight shadow, like under the chin, on the sides of the nose, or in the crook of an arm. This begins to sculpt the form.
- Blush (Optional): For a touch of youthful glow, add a very tiny speck of Cadmium Red to your skin tone mix and lightly dab it onto the cheeks. Blend gently.
- Don't Overwork It: Skin tones can be tricky. Try not to blend excessively, as this can make the paint muddy. Work in thin layers and allow each layer to dry if you need to build up depth.
(Time Check: You should be around the 33-minute mark. The children are starting to look more lifelike!)
Step 4: Adding the Highlights (Approx. 12 minutes)
Highlights are what bring life and dimension to your painting, indicating where light is directly hitting the surfaces.
- Prepare Your Lighter Mixes:
- For the Water: Add a good amount of Titanium White to your Ultramarine Blue, perhaps a touch of Sap Green. This will create the glistening surface of the river.
- For Foliage: Add Titanium White and a bit more Cadmium Yellow to your Sap Green for sunlit leaves.
- For Skin: Add a tiny bit more Titanium White to your base skin tone mix.
- For Clothing: Add Titanium White to the base color you chose for their clothes.
- Highlights on the Water: Using your medium round or small flat brush, apply streaks of your lighter blue mix to the river's surface. Think about how sunlight would reflect and sparkle on the water. Use horizontal strokes to emphasize the flatness of the water.
- Highlights on Foliage/Bushes: With a dabbing or stippling motion using your medium round brush, apply the lighter green mix to the tops and edges of the background foliage and any bushes you envision along the riverbank. This creates texture and the impression of sun-drenched leaves.
- Highlights on Clothing: Apply the lighter versions of their clothing colors to the parts of their shirts, shorts, or dresses that would catch the most light – shoulders, tops of folds, etc.
- Highlights on Skin: Using your smallest brush, apply the lightest skin tone mix sparingly to areas like the bridge of the nose, forehead, tops of cheeks, and any exposed shoulders or knees that would be directly in the light. Be very subtle here; a little goes a long way.
- Hair Highlights: For hair, use a lighter version of the hair color to add thin strokes that suggest strands catching the light.
(Time Check: You're now at about the 45-minute mark. Your painting should be glowing with light!)
Step 5: Retouching and Adding Bushes and Casted Shadows (Approx. 9 minutes)
This final step is where we refine details of the children beside the river, add crucial elements like bushes, and ground our figures with realistic cast shadows.
- Refine Details on Children:
- Eyes, Nose, Mouth: Using your smallest brush and a very diluted dark brown or black, delicately add tiny dots for eyes. A thin line for the nose and a subtle curve for the mouth. Remember, less is often more with small faces.
- Hair Strands: Add a few more defined hair strands with both your base hair color and a lighter highlight.
- Clothing Edges: Tidy up any edges of their clothing if needed.
- Add Bushes and Ground Texture:
- Bushes: Using a mix of various greens (Sap Green, Ultramarine Blue, Cadmium Yellow, and White), dab and layer colors to create the impression of lush bushes along the riverbank. Vary your greens for natural interest.
- Grass/Ground: Use small strokes and dabs of greens, browns, and even some Raw Sienna to suggest grass, pebbles, or dirt on the ground where the children are standing.
- Casted Shadows: This is critical for making your figures feel part of the scene.
- Shadow Mix: Mix a thin, translucent wash of Ultramarine Blue and a tiny bit of Burnt Umber (or a very diluted gray using black and white). This creates a cool, realistic shadow color.
- Apply Shadows: Observe your light source (imagine where the sun is coming from). Apply this shadow mix to the ground directly beneath the children's feet, extending slightly away from them in the direction opposite your light source. Add a subtle shadow beneath any other prominent objects. This grounds them and adds a sense of realism.
- Final Retouches: Step back from your painting. Are there any areas that need a little more color, a sharper edge, or a softer blend? Make any final adjustments, adding a tiny highlight here or deepening a shadow there. This is your chance to make the painting truly yours.
(Time Check: You should be close to the 54-minute mark! Congratulations, you've completed your painting!)
Conclusion
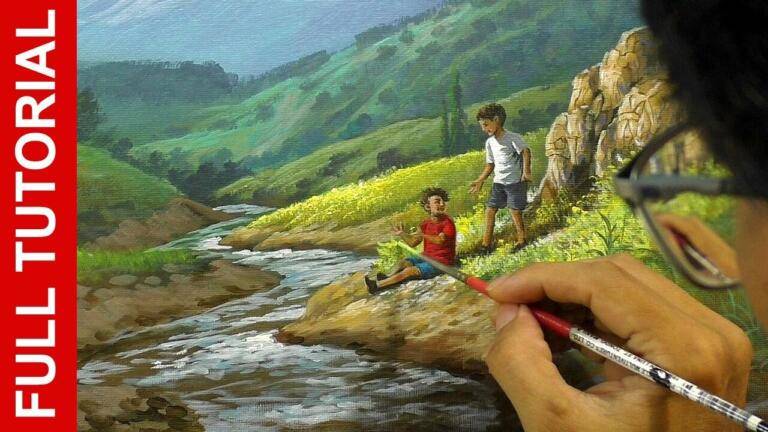
Phew! You've successfully navigated the vibrant world of acrylics and created a beautiful scene of "Children Beside the River." This acrylic painting tutorial covered the essential steps from sketching to highlighting and adding crucial shadows, giving you a solid foundation for capturing light and form.
Remember, every stroke is a learning opportunity. Don't be afraid to experiment with colors, try different brushstrokes, and most importantly, enjoy the process. Acrylic painting is a journey of discovery, and with each canvas, you'll grow more confident and expressive.
We hope you enjoyed this acrylic painting tutorial with step-by-step instructions. Now, step back, admire your work, and perhaps share your lovely "Children Beside the River" painting with friends and family! Happy painting!
Part 1 of the Video: Rushing River over the Valley
Support me and Become my Patron: https://www.patreon.com/jmlisondra
Subscribe to my Youtube Channel.

Leave a Reply to @dangthanhvinhofficialtv Cancel reply
8 comments on “Children Beside the River Full Acrylic Painting Tutorial with Step-by-Step Instructions in 54 minutes”

About the Artist


Wooow ❤Süper ❤Wonderful painting ❤Beautiful ❤Thanks ❤❤❤❤❤❤❤❤❤❤
This is beautiful. I have learned so much from your tutorials. You take the time to show us what paints to use, how to mix them, and what brushes to use. Your videos are a true step-by-step. You have taught me well that, at the moment, I am working on a commission! Thanks to your teaching, I have sold paintings. The painting I am working on has a lot of plant life in it. I am using your video Acrylic Painting Lesson - How to Paint Grasses and Other Plants by JMLisondra, to brush up on how to do grass and leaves. When I finish it before I give it to the client, I will post it to the FB page. Thank you so much! You have taught me how to be an artist.
Thank you very much Susan.. I am really glad you sold your works.. congratulations! I love to see your results... keep painting... :)
Вау, как же это здорово ! 😍
hello idol . i like drawing . ^^
Idol comment here 🎉🎉🎉🎉
@jmlisondrathanks so much idol
Amazing!